Are Jerusalem Artichokes Better Than Potatoes in Pots?

Easy to grow, hard to buy, and brilliant in the kitchen
I’m always on the lookout for reliable, easy plants to grow in containers - both for myself and for any of you looking for a few dependable ‘bankers’.
At first sight, Jerusalem artichokes look far too large for pots. I even remember reading, years ago, that they weren’t suitable for container growing. Then one year I tried them on a whim—and was surprised at how easily and vigorously they grew, even in the confines of a pot. And how well they yielded.
They do best in a 30–50 litre pot, but will still grow and give a reasonable harvest in something as small as 10 litres (about small bucket size).
Why grow Jerusalem Artichokes?
Jerusalem artichokes are a great choice for growing at home for several reasons.
They need only around three hours of sun to grow and yield well. They’re tough and reliable, coping well in cool summers when other crops struggle. Their enthusiasm for growing makes them the veg equivalent of puppies straining at the leash. Once you’ve grown them once, it’s also really easy to save a couple of tubers to grow them again - so no need to buy new tubers every year.
They’re ready to harvest in January and February—a time when other pickings are often lean. And unless you live near a good farmers’ market, they can be hard to find in the shops.
They’re also rich in inulin, a type of fibre that feeds beneficial gut bacteria and supports digestive health. For this reason, they’re often recommended as a prebiotic.
Last but not least, they’re delicious—particularly roasted in their skins—and make excellent soups and risottos.
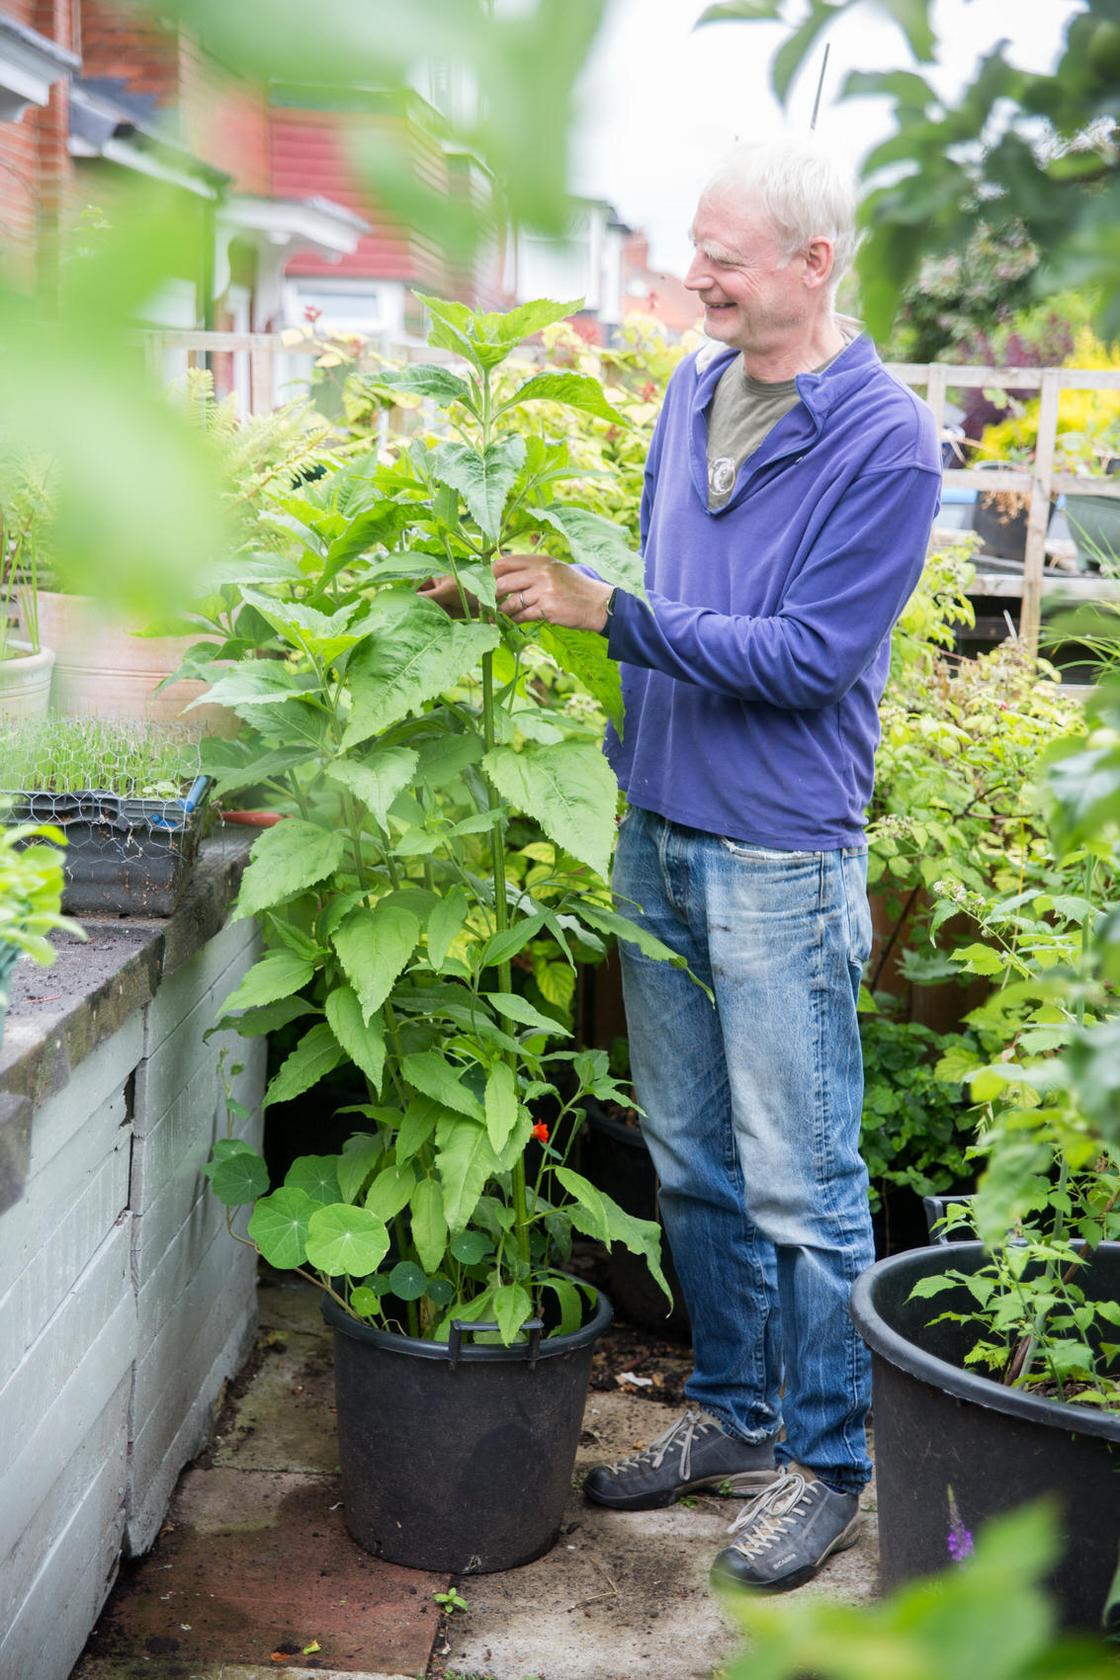
Jerusalem artichokes in mid June. These are growing in a corner of the yard with only a few hours of sun a day - but they still seem to do pretty well.
3 kilos from a 30 litre pot
I grew them last year in a 30 litre pot and, despite harvesting a little late this year (due to some recent mobility issues), got just over 3 kilos.
Given that around 300g is enough for a risotto for three people, that’s quite a few meals. In fact, as much as I love Jerusalem artichokes, 3kg is about the perfect amount for us.
They don’t store well at room temperature (going flabby within a few days), but will keep fine for a month or two in the fridge.
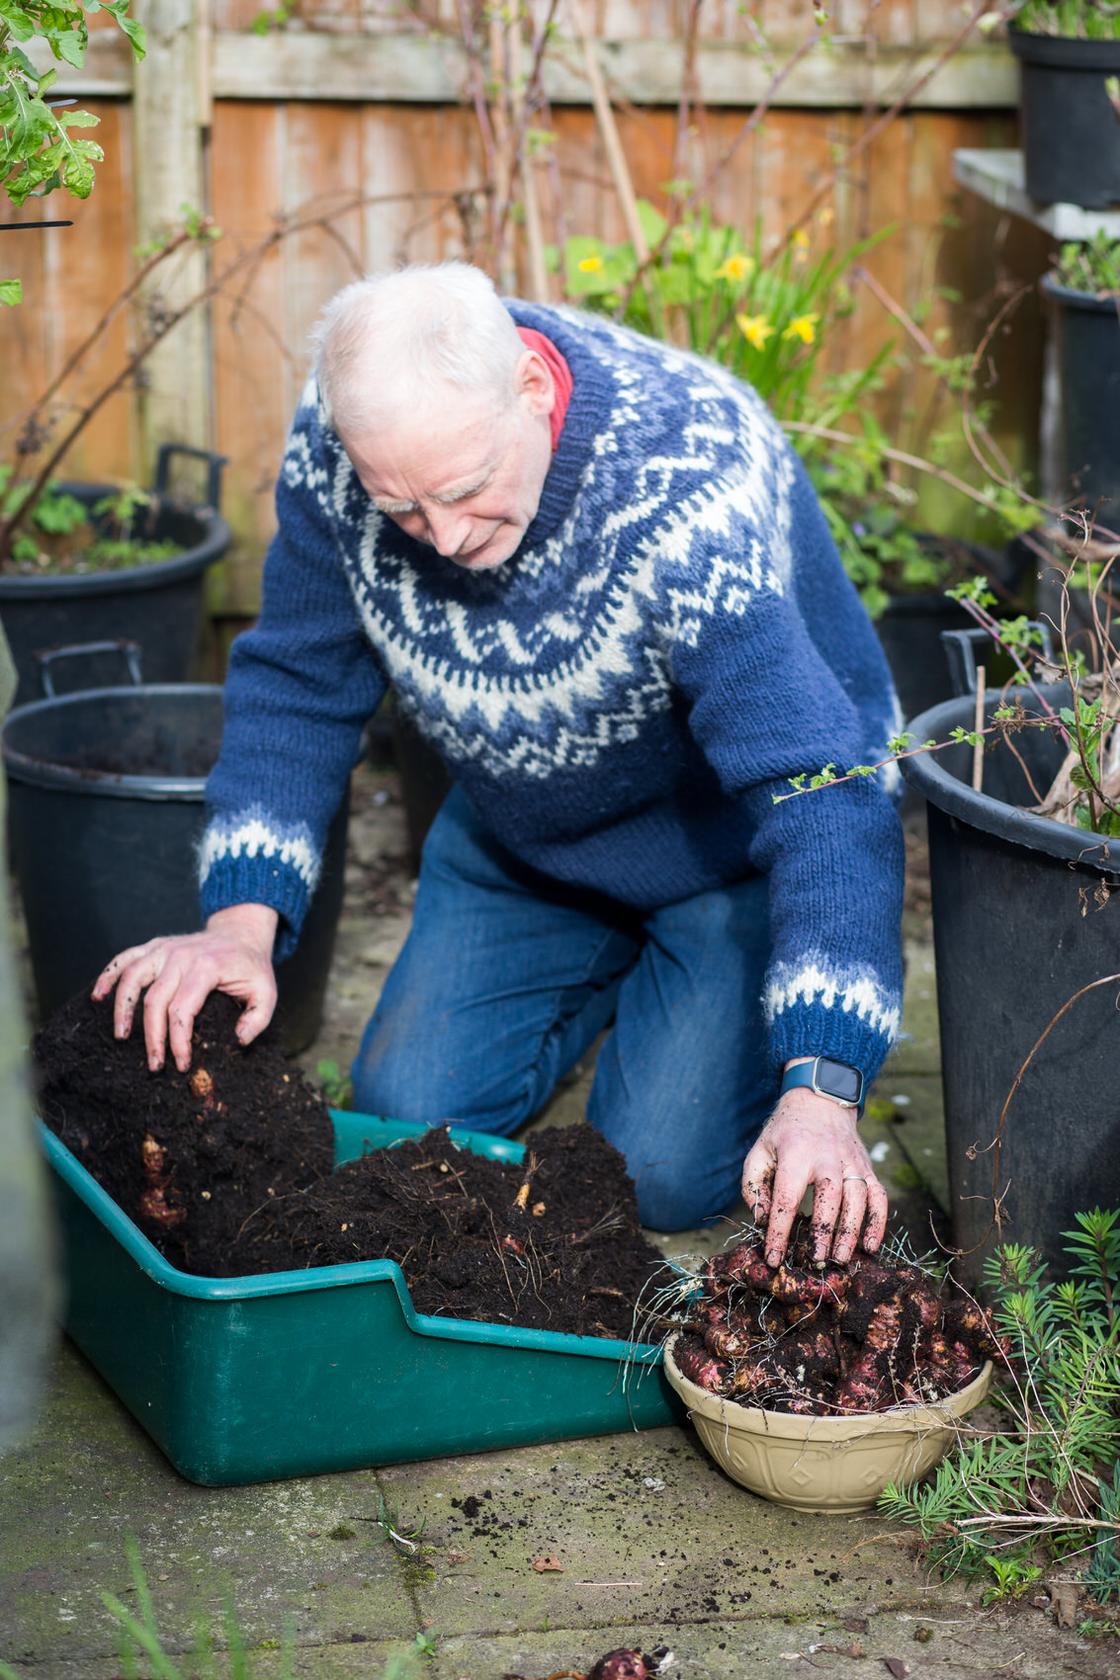
Harvesting in March. This is the same container pictured at top of page , now full of tubers. The variety is ‘Red Fuseau’. We’ll eat most of these, just saving a couple to grow next year.
How to grow
Jerusalem artichokes are grown from tubers, like potatoes. You only need one tuber for a small pot (10–20 litres), or two for a larger one (40–50 litres).
If you see them at a farmers’ market, buy some to eat and set one or two aside to plant (store them in the fridge until you do). They’ll usually grow just fine. Alternatively, you can buy them online or from some garden centres.
If you have a choice of varieties, the fatter, smoother-skinned ones—like ‘Red Fuseau’—are easier to peel and prepare in the kitchen.
 This is a white, skinnier, unknown variety I was given. It’s fine, but ‘Red Fuseau’ is fatter and easier to process. These were grown in a 10 litre pot and still yielded well.
To grow them, it really is as simple as filling a pot with compost and burying the tuber about 10cm (4 inches) below the surface—any time from March to May in the UK.
They’re happy growing in last year’s compost, as long as you top up nutrients. A handful or two of a general-purpose fertiliser (such as blood, fish and bone), or about 20% worm compost, works well.
Keep them well watered, and feed every two or three weeks with a general-purpose liquid feed through summer and autumn (or add a 1–2cm layer of worm compost to the surface every few weeks).
By mid-summer they can reach 2 metres or more. In pots, they can become prone to blowing over. You can trim them back to the height you want by cutting stems just above a pair of leaves—this also encourages bushier growth. Avoid removing more than a third of the plant at any one time.
Established plants are thirsty, so keep them well watered.
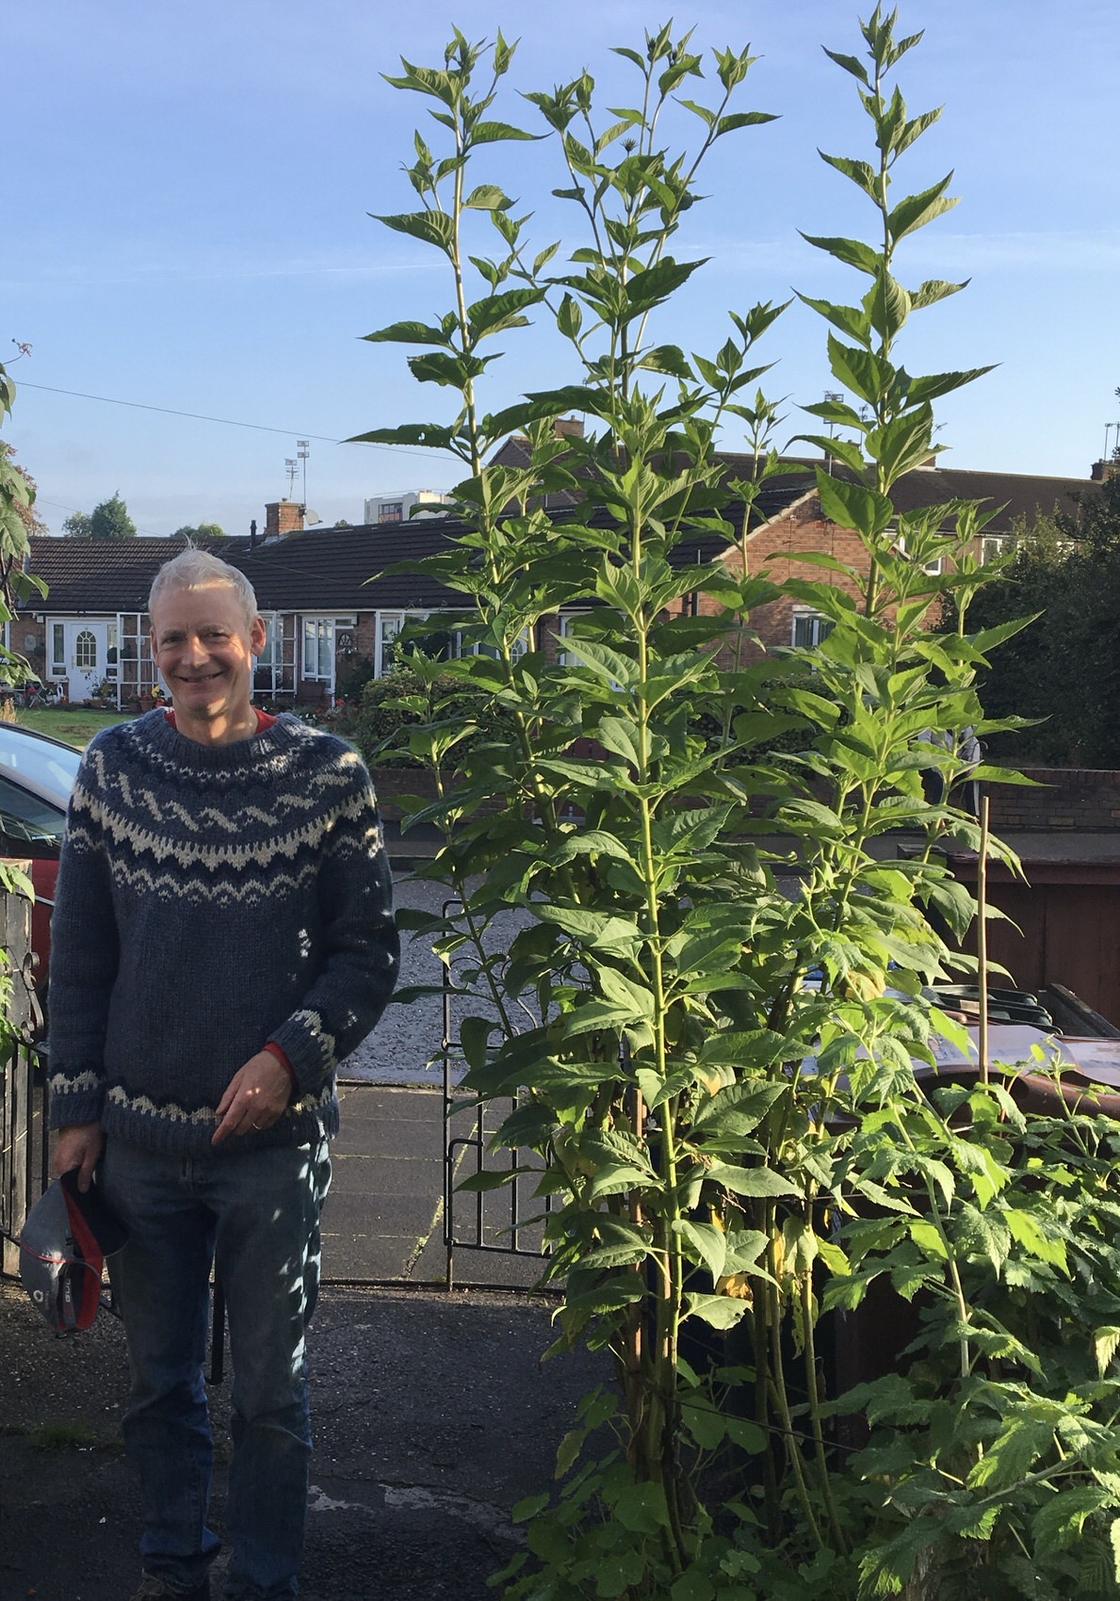
Jerusalem artichokes grow tall (I’m 6 foot 2), but you can cut trim them back. These are growing in an old supermarket crate which has a volume of nearly 50 litres but a depth of only 6 inches.
Harvest between January and early March, either by digging around in the pot or tipping it out.
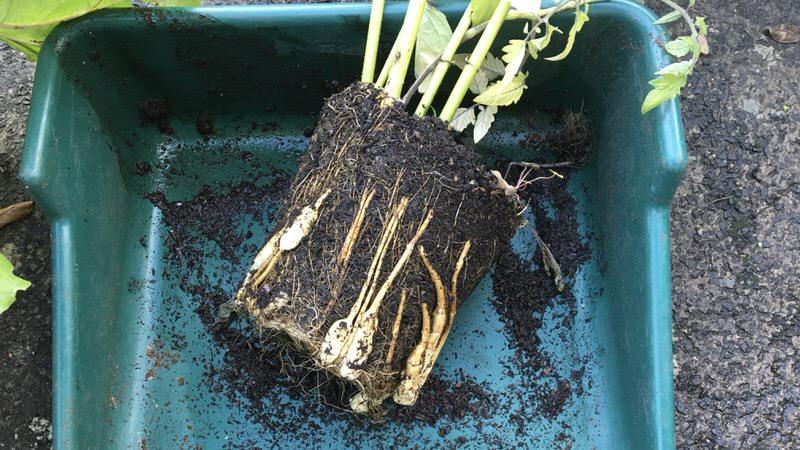
The tubers below were harvested a little late (late March), and you can see they’ve already started sprouting. They still taste the same, though, and will grow perfectly well if replanted.
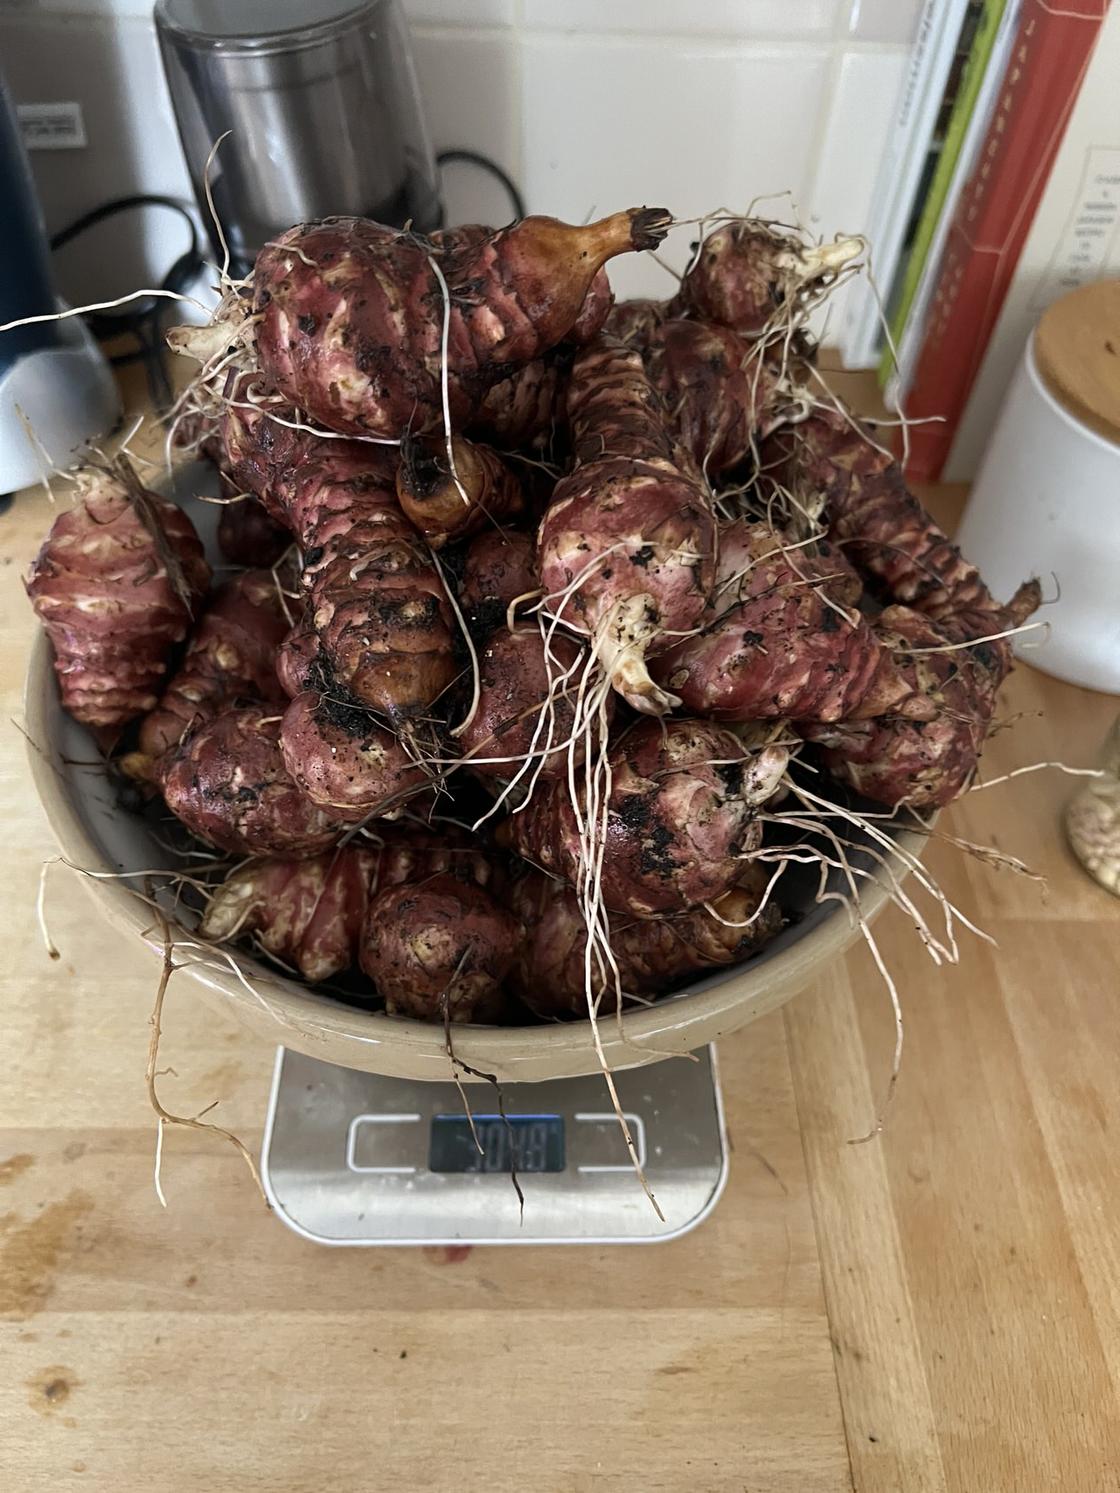
This year’s harvest. Just over 3 kilos - and just enough for our needs. You can see the tubers have already started growing roots so ideally I would have harvested a little earlier.
How to Eat
They’re delicious roasted (no need to peel), either on their own or mixed with other root vegetables.
They also make excellent soups and rich, flavourful risottos, and can even be shaved raw into salads.
In his book Jerusalem, Ottolenghi roasts them with chicken, shallots, preserved lemon and pink peppercorns—well worth trying.
Plant artichokes instead of potatoes?
If space is limited, Jerusalem artichokes are, in many ways, a better choice than potatoes.
Jerusalem artichokes are very forgiving and generally free from the build-up of diseases that can affect potatoes, so replanting a few tubers from your own harvest is usually easy and reliable. Potatoes, by contrast, are prone to accumulating viruses and other diseases, hence the advice to start each year with certified, disease-free seed potatoes.
They’re also harder (and usually more expensive) to find in shops—and crucially, they give you something to eat in January and February when very little else is growing.
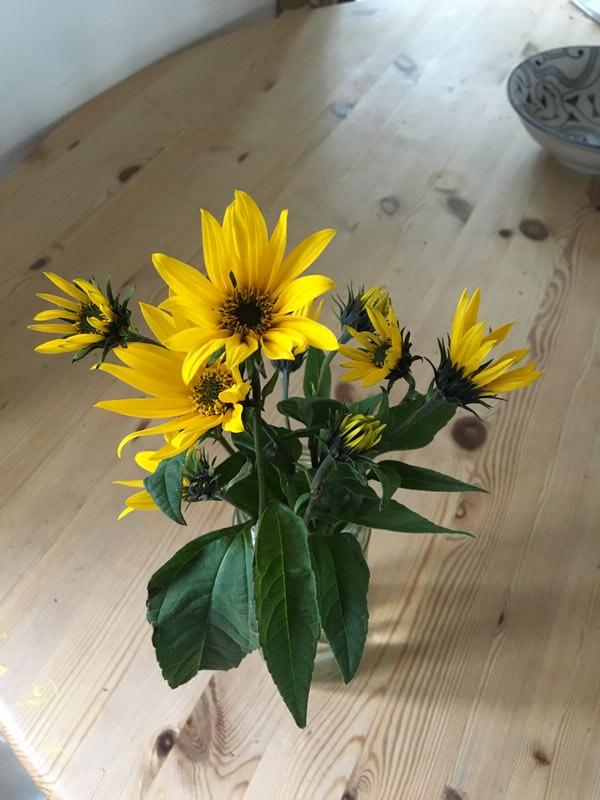
As a bonus, you will sometimes get flowers, too. Jerusalem artichokes are related to sunflowers, as you can probably see.
If you’ve grown Jerusalem artichokes in containers, I’d love to hear how you got on—along with any tips, preferred varieties, or favourite recipes to eat them!
0 comments
Leave a comment